The best way to drive traffic to your website is performing well in organic search results. Google applies many factors when ranking websites in search results, and Search Engine Optimization (SEO) is crucial for a successful website.
Guesty for Hosts' direct booking website is designed with SEO in mind. In addition, Google Search Console will help you get recognized by Google faster and better while providing some insights regarding your website’s Google search performance.
In order to get started with SEO, you need to have a Google Search Console account and add your website to your Search Console. Follow the steps below.
1. Add Your Website to Google Search Console
Create a New Google Search Console Account
- Click this link to create a new account.
- Choose the URL prefix option, and enter the URL of your website in the format indicated.
- Click Continue.
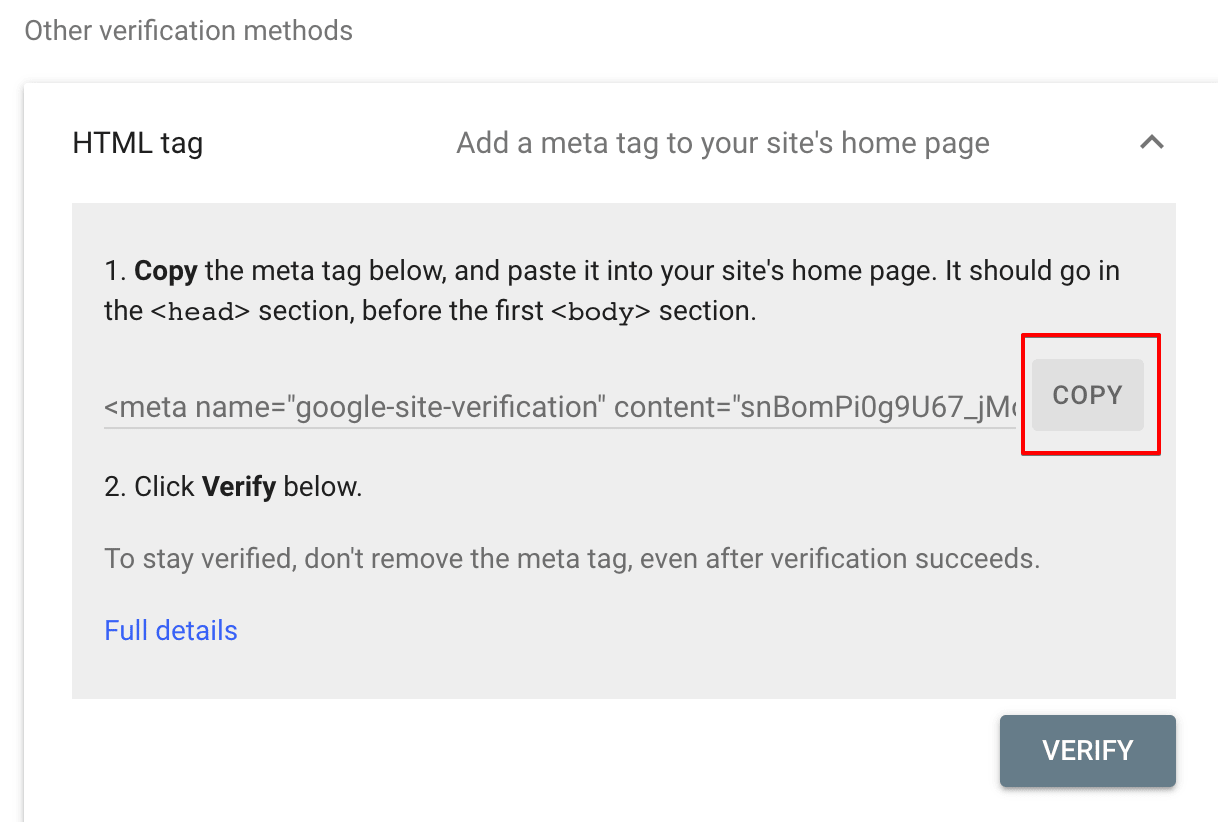
- Under "Other verification methods", scroll to HTML tag and click the down arrow.
- Be sure to select "HTML tag", NOT "HTML file".
- Next to the meta tag displayed, click Copy as shown in the screenshot below.
Add to Existing Google Search Console Account
- Sign in to your Google Search Console account.
- In the upper left, click Add property.
- Choose the URL prefix option, and enter the URL of your website in the format indicated.
- Click Continue.
- Under "Other verification methods", scroll to HTML tag and click the down arrow.
- Be sure to select "HTML tag", NOT "HTML file".
- Next to the meta tag displayed, click Copy as shown in the screenshot below.

2. Add the Meta Tag in Guesty For Hosts
- Sign in to your Guesty For Hosts account.
- Click Menu.
- Click Website Builder.
- Click Edit Website.
- Click the relevant website.
- Scroll down and click 3rd Party Integrations.
- Under "Google Search Console HTML Tag", paste the copied meta tag, then delete everything except the unique string as shown in bold:
- <meta name="google-site-verification" content="UxndvNcBNLppLeuiHceFFIGXJl9rTUO_uHb8bNo9vZw" /> “

- Click Save.
- Go back to your Google Search Console account, and click Verify.
3. Add a Sitemap to Google Search Console
Critical for SEO, a sitemap indexes your website pages and makes sure only your most up-to-date content appears in search results.
- Sign in to your Google Search Console account.
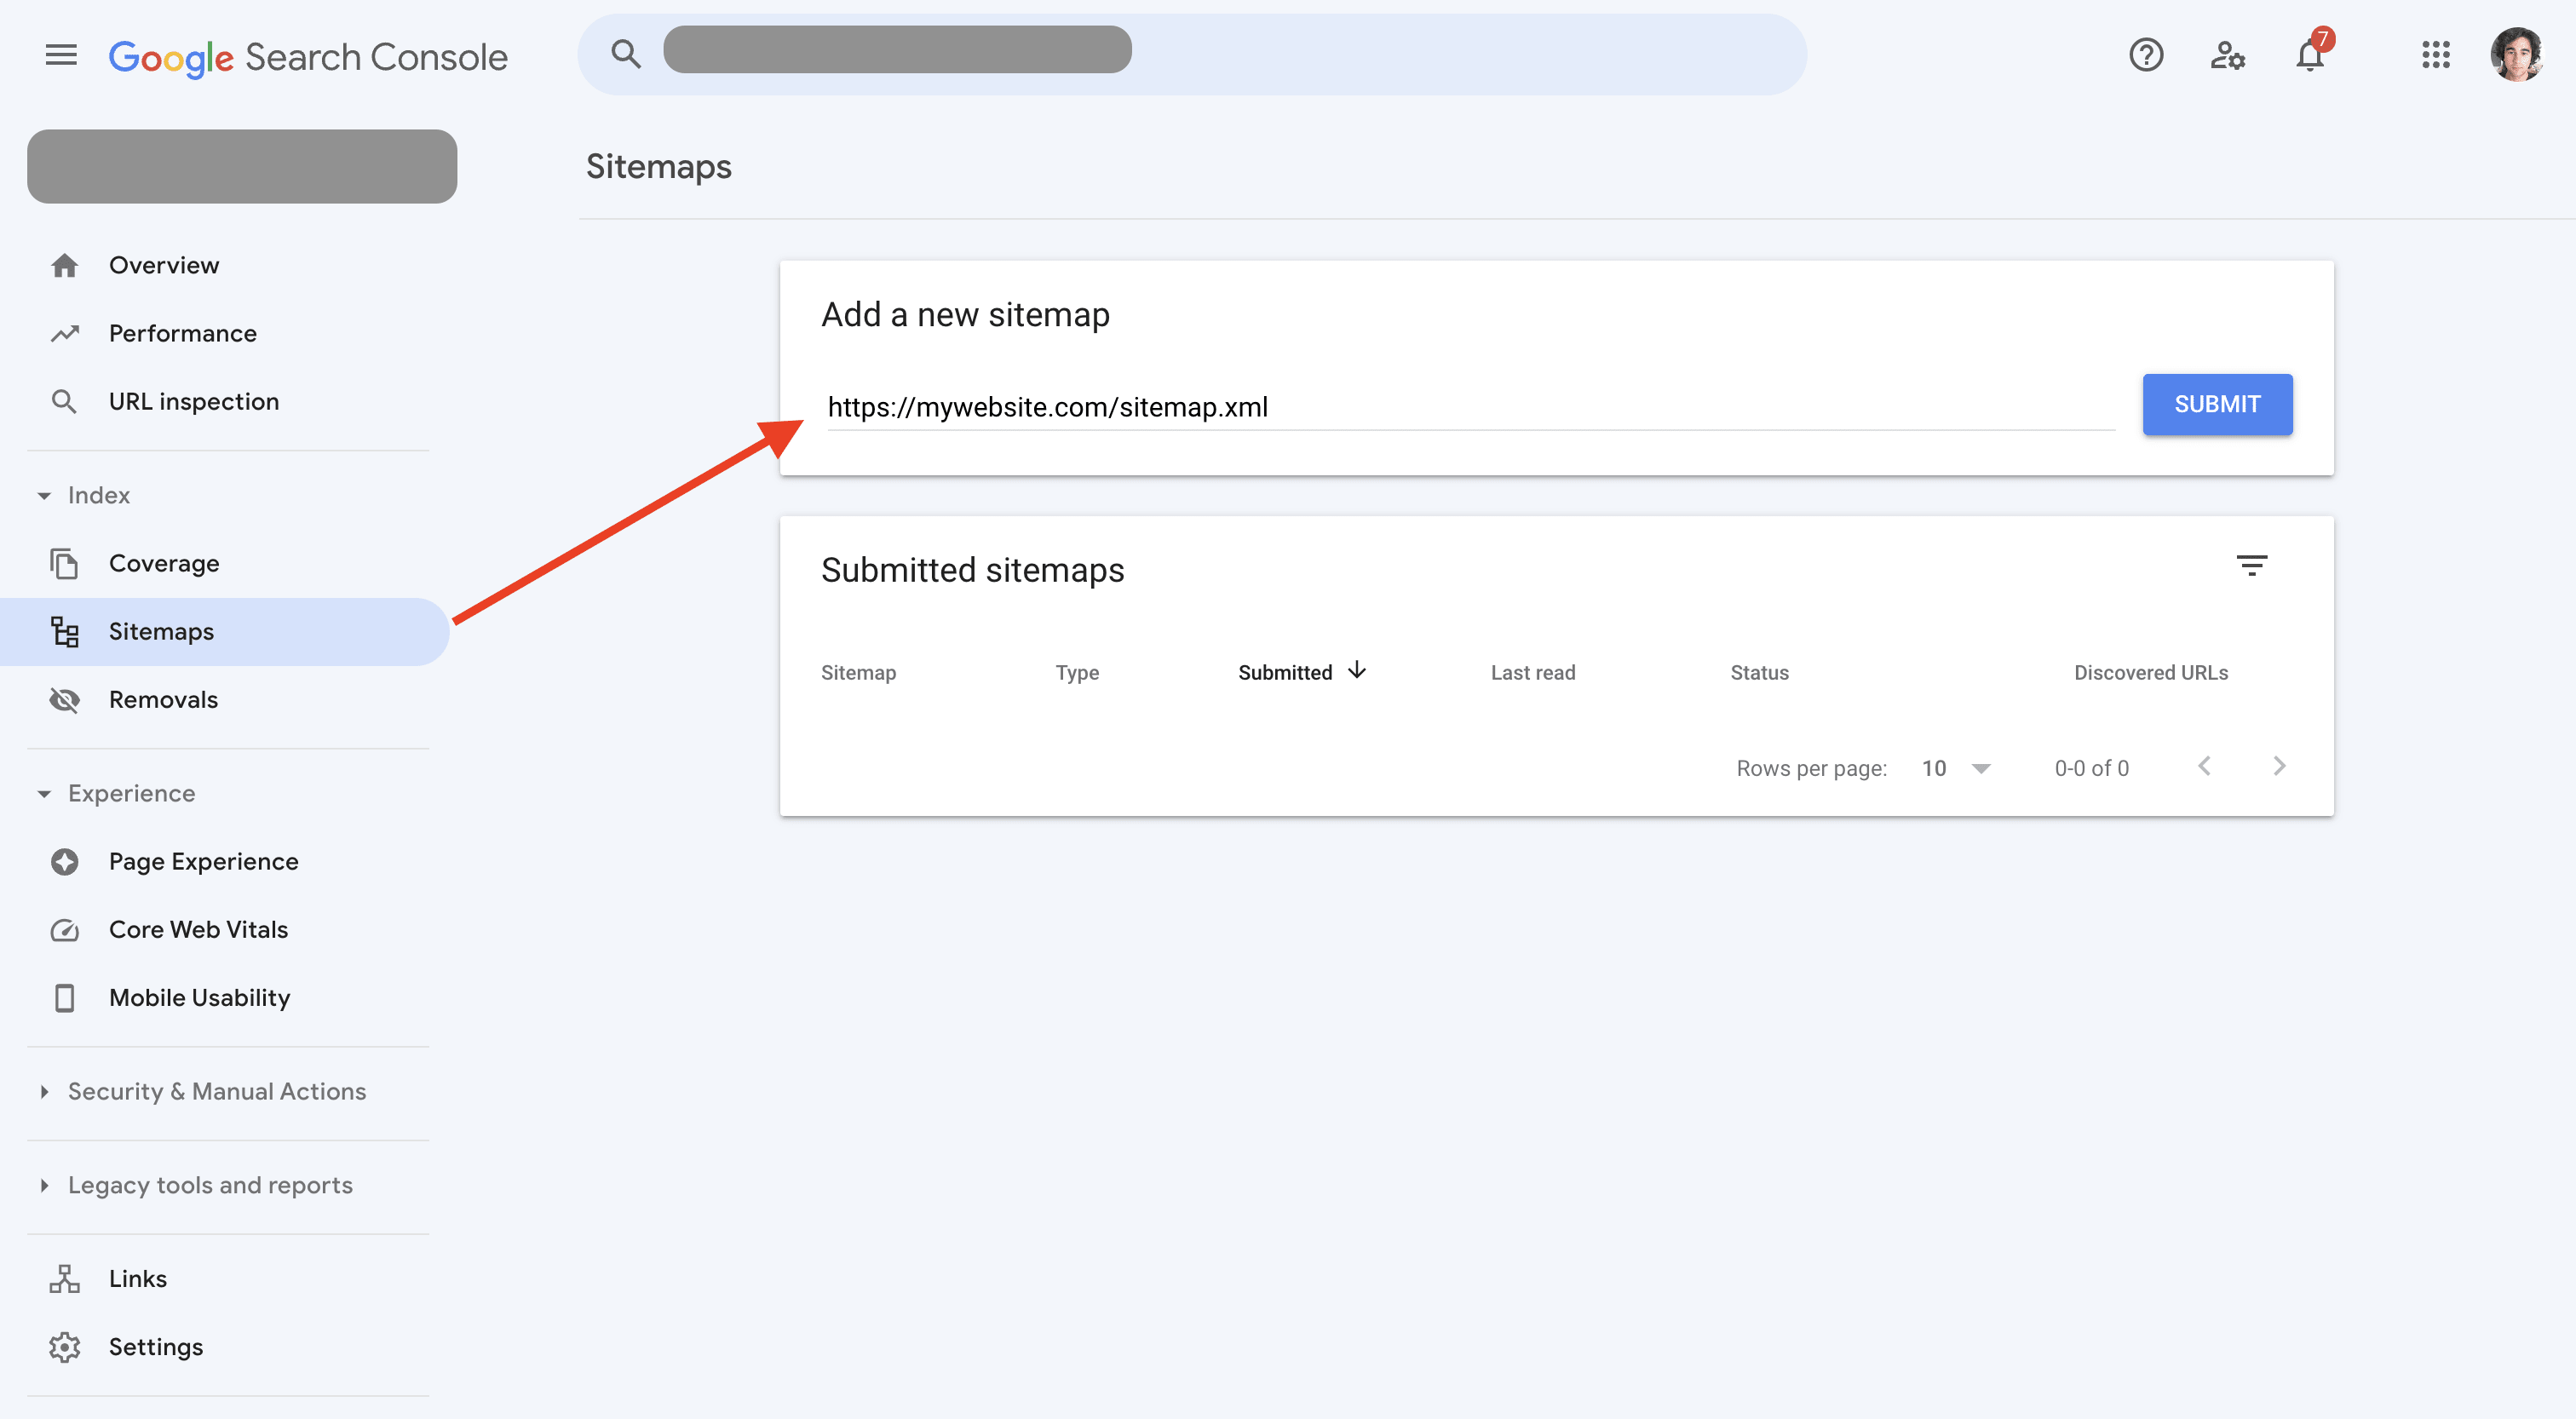
- In the lefthand menu, click Sitemaps.
- In the pop-up under "Add a new sitemap", type "sitemap.xml" at the end of your URL as shown in the screenshot below.
- Click Submit.
Your website's sitemap will now appear under "Submitted sitemaps".
