Your Airbnb listings can be easily imported when you first connect your Airbnb account to Guesty For Hosts. If you still need to import your listings, follow the steps below for the following two scenarios:
- Import your first listing to start using the Guesty For Hosts features
- Import additional or new listings at any time
Important:
New listings are not created directly in Guesty For Hosts, they must be created in Airbnb first and then imported.
You must be on Airbnb's Standard pricing and availability model to import your listings. Learn more.
Import First Airbnb Listing(s)
Until you import your first listing and can start using the Guesty For Hosts features, you will see an "Import your listings" button throughout the platform. When you are ready to import, you can include one or all of your listings during this process.
- Sign in to your Guesty For Hosts account.
- Click Import your listings.
- Select the listings to import, then click Import your listings.
- Allow a few minutes for this process.
- The status of each listing will change from "Waiting" to "Importing" to "Done".
- If a listing status shows "Failed", click Retry.
- Once the import process has finished, click Continue.
- Review changes to your listing settings and make updates as needed.
Import Additional Airbnb Listings
Once you've imported at least one Airbnb listing and can use all Guesty For Host features, additional listings can be imported and managed in Guesty For Hosts at any time. Follow the steps below.
- Sign in to your Guesty For Hosts account.
- In the top menu, click Menu.
- Click Listings.
- Click your Airbnb account.
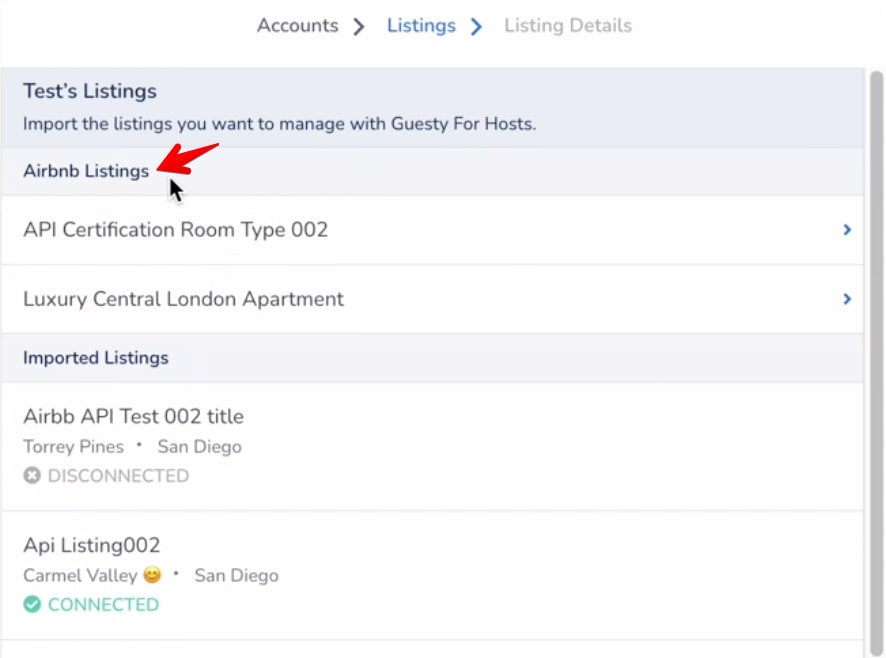
- Your listings are displayed in two sections:
- Airbnb Listings: Listing not yet imported are in this top section.
- Imported Listings: Listings already imported are displayed in the second section, with their connectivity status displayed.
- Click a listing to import.

- In the next screen (scroll down to view all options):
- Click Continue.
- In the pop-up box, read the listing setting changes that will occur and click Confirm.
- Review changes to your listing settings and make updates as needed.
Repeat the above steps for any additional listings.
Activate Guest Email Address in Airbnb
- Sign in to your Airbnb account.
- Click Account.
- Navigate to Professional Hosting tools.
- Toggle on Allow me to email documents to guests to receive guest emails.